POST
Configure Intel SGX on Win10
The first step we should know if the hardware support SGX.
Which include:
- BIOS support?
- CPU support?
- Software packages installed?
Now let us go through the above one by one.
CPU Query
- Get the CPU model of your hardware.
By device manager -> processors
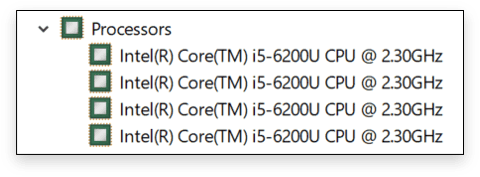
- Find the corresponding model on the Intel official website, which will indicate whether it supports SGX.
 Oh! My laptop’s CPU supports but need install IME software.
Ok, remember this requirement and do it later. 😎
BIOS Query
There is 3 kind of settings on the system BIOS for SGX.
- Enable
- Software controlled - enabled through software applications. If Intel SGX is set to software-controlled, Intel SGX is initially disabled. You need to make the following calls in the SDK through software application to set it to enabled state:
sgx_enable_device()
sgx_cap_enable_device()
Set software control mode is helpful to reduce consumption of system resources otherwise the SGX is always on and occupies a larger amount of RAMs which affects other programs and processes.
- Disable
Support software package
-
Intel SGX software package list
 Download SGX software packages at here.
 -
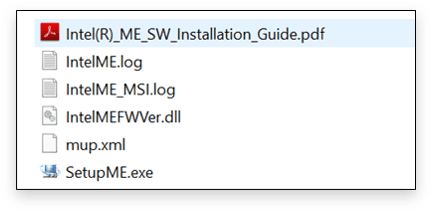
Install IME (Intel Management Engine) Download IME package at here. Run SetupME.exe
-
Microsoft Visual Studio 2015/2017
Should install Microsoft Visual Studio 2015/2017 before install SGX SDK/PSW, it is important here for the installation sequence. The SGX SDK will install the plug-in on Visual Studio, if SGX SDK is installed firstly, Visual Studio will lose the plug-in.
The Visual Studio install package is at here. -
Install SGX SDK
 Run
Run Intel(R)_SGX_Windows_SDK_2.7.101.2.exe. -
Install PSW
RunIntel SGX PSW for Windows v2.7.101.2.exeand unzip.
You will get a folder Check the build number of operating system by
 winvercommand.

- If the system is windows 10 fall creators update (version 1709) or later, enter
PSW_INF_RS3_and_abovefolder, run windows PowerShell as administrator to open command line window, and then enterPSW_INF_RS3_and_above devicedirectory, keep going down until findsgx_base.inffile, input the following command:
- If the system is windows 10 fall creators update (version 1709) or later, enter
pnputil /add-driver sgx_base.inf /installGo back to PSW_INF_RS3_and_above component directory, go down until find sgx_psw.inf file, input the following command:
pnputil /add-driver sgx_psw.inf /install- If it is the previous version, choose
PSW_EXE_RS2_and_beforefolder and run
Intel(R)_SGX_Windows_x64_PSW_2.7.101.2.exeto install.
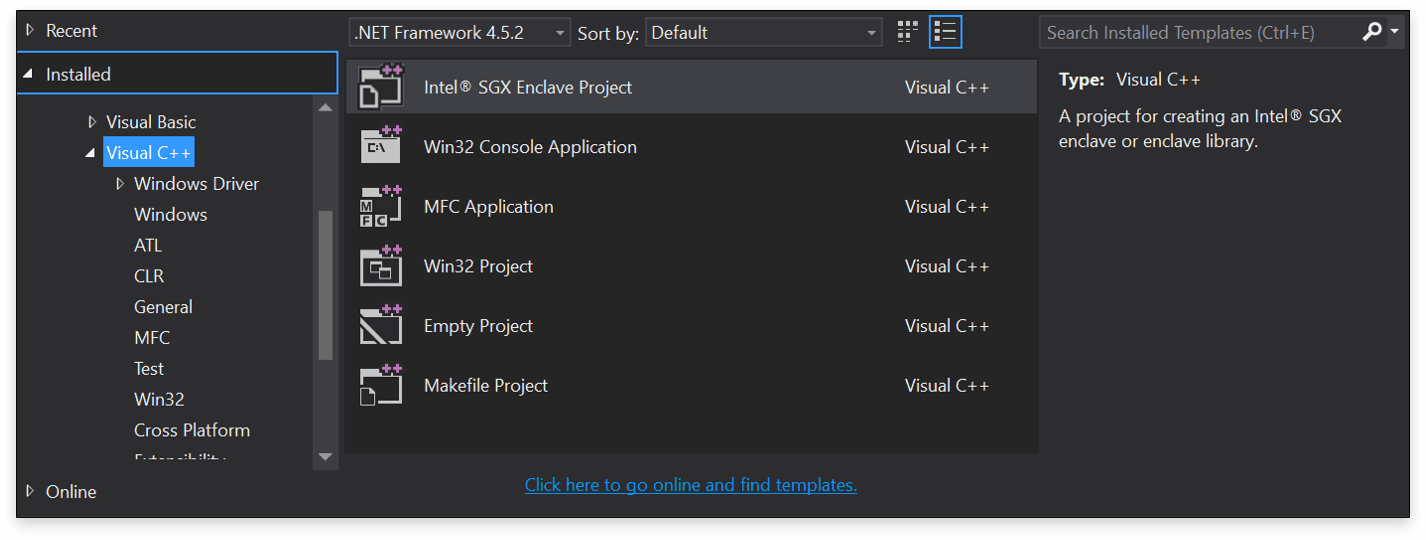
Open the Visual Studio 2015 and create a new VC++ project, if theIntel SGX Enclave projectcan be found in the template window, it means the SDK and Visual Studio plug-in has been installed successfully.