POST
Gitalk Usage
If you are looking for a quick solution about how to add a comment function on your blog, this article probably can help you.
I have been trying to add a comment function under my blog for the past few days. My blog was built on Github by Jekyll, Jekyll is just a tool for generating static web pages, and does not provide database support, which means, I need help with the third-party software tool.
Of course, disqus is the first choice that you can think out however it is not a good option for china users for some known reasons. After reviewed some popular third-party tools, I decided to use Gitalk to construct my comment function.
Remember Github is all-powerful, you can find everything on it. I found Gitalk on Github. Gitalk is a comment component based on the Github issue and preact. Actually, it is a Github project, designed for Github users and easy to be applied on the Github pages. Gitalk stores the comments into your repository issues and doesn’t need any extra database.
The official Github page link of Gitalk is Here.
It is amazingly easy to use and no need for database support in the background. Moreover, it can support multiple languages includes Chinese.
The installation is simple, just need to refer to the below procedure.
- Register a Github application, as a Github application you need to get authorization before using it. The path to open the OAuth Apps page is
- Github homepage->Settings->Developer Settings->OAuth Apps.
- Github homepage->Settings->Developer Settings->OAuth Apps.
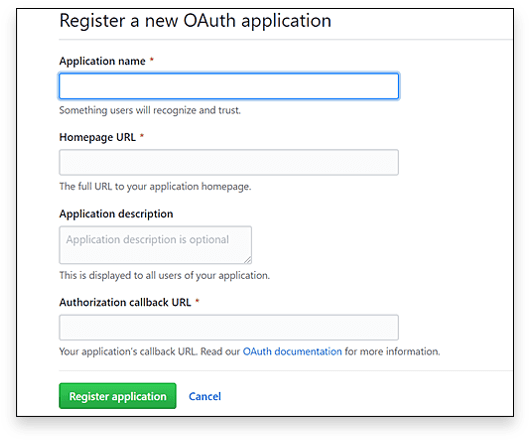
You must specify the website domain URL in the Authorization callback URL field.
After registration, you will get a Client ID and Client Secret, remember these two numbers, you will need to fill them in the following step.
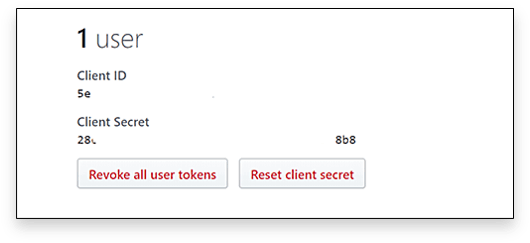
Please note, the user number is zero at this moment when you haven’t authenticated the application. You need to do it later.
Now you have registered Github application for Gitalk.
Next, copy the below code snippet into the page where you want to use Gitalk or add it to the post’s page, it depends on your website’s structure.
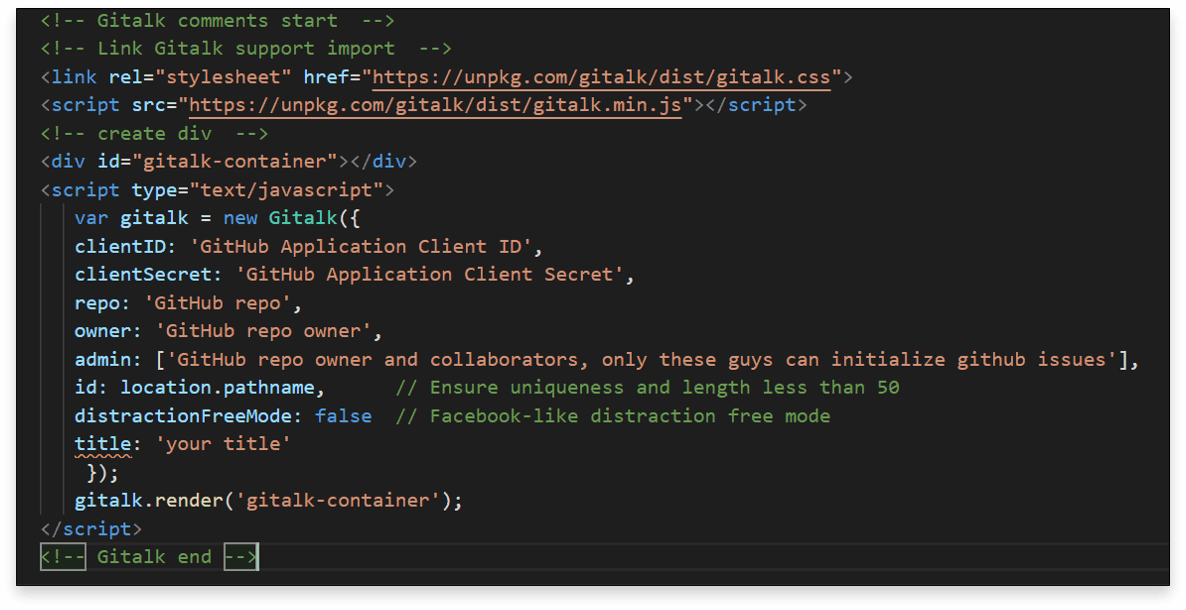
Below are the setting options.
clientID- Github Application Client ID.
type: String.
Required.clientSecret- Github Application Client Secret.
type: String
Required.repo- Github repository.
type: String
Required.owner- Github repository owner. Can be personal user or organization.
type: String
Required.admin- Github repository owner and collaborators. (Users who having write access to this repository)
type: Array
Required.id- The unique id of the page. Length mustless than 50.
type: String
Default: location.href.number- The issue ID of the page, if the number attribute is not defined, issue will be located using id.
type: Number
Default: -1.labels- Github issue labels. Array
type: Array
Default: [‘Gitalk’].title- Github issue title.
type: String
Default: document.title.body- Github issue body.
type: String
Default: location.href + header.meta[description].language- Localization language key, en, zh-CN and zh-TW are currently available.
type: String
Default: navigator.language || navigator.userLanguage.perPage- Pagination size, with maximum 100.
type: Number
Default: 10.distractionFreeMode- Facebook-like distraction free mode. Boolean
type: Boolean
Default: false.pagerDirection- Comment sorting direction, available values are last and first.
type: String
Default: ‘last’createIssueManually- By default, Gitalk will create a corresponding Github issue for your every single page automatically when the logined user is belong to the admin users. You can create it manually by setting this option to true.
type: Boolean
Default: false.proxy- Github oauth request reverse proxy for CORS. Why need this?
type: String
Default: https://cors-anywhere.herokuapp.com/ https://github.com/login/oauth/access_token.flipMoveOptions- Comment list animation. Reference
type: Object
Default:
{
      staggerDelayBy: 150,
      appearAnimation: 'accordionVertical',
      enterAnimation: 'accordionVertical',
      leaveAnimation: 'accordionVertical',
}enableHotKey- Enable hot key (cmd|ctrl + enter) submit comment.
type: Boolean
Default: true.
Since Gitalk uses the repository issues to store the comments, so don’t forget to enable your repository issue function.
The default setting is enabled.
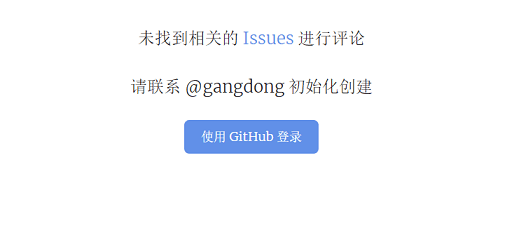
For now, the Gitalk comment component has been added into your website successfully.
The appearance is like this.
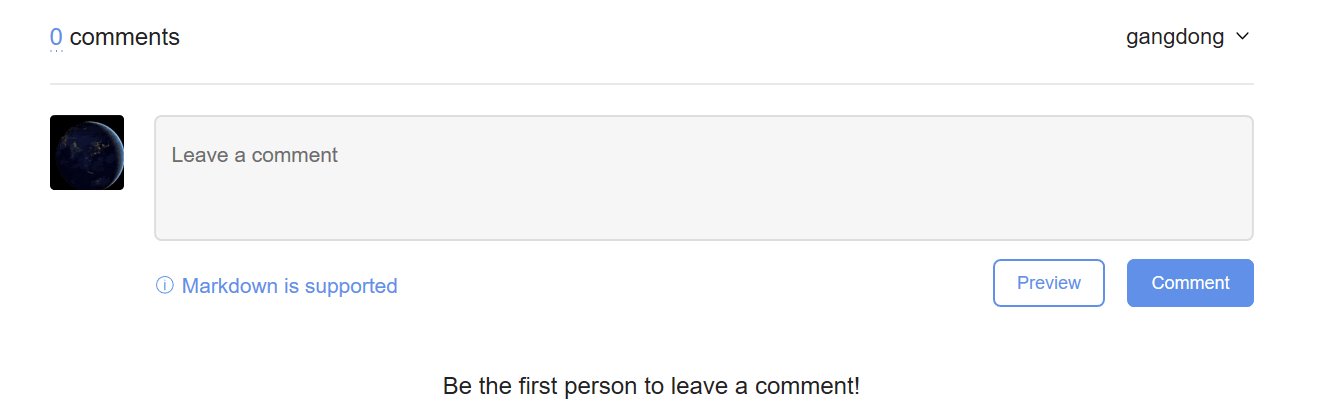
When first loading, you will be requested to sign in your Github account to active the comment function.
Active it then you can use it now!
If you like this page or you have anything would like to share, comment below! 🙂