POST
CI platform migration: from Travis CI to GitHub Actions
I’ve used Travis CI to build and deploy my projects for some years. The performance of Travis CI can meet my requirements. However, recently I found Travis CI stopped working for me. ☹️
The motivation of migrating
The service of Travis CI provided convenience and helped me a lot with my development works during the past few years, I really appreciated it!
Until one day a couple of weeks ago, I received the notification from Travis CI, “My builds have been temporarily disabled for public repositories due to a negative credit balance”. I realized that the time of free use is over. I need to pay for the service now.
From the beginning, Travis CI was built to integrate with GitHub repositories and offer free open source CI. It was popular since then around the open-source developers. I think it is not only because of the powerful functionality but the free model of service. I knew Travis CI was purchased by Idera in Jan 2019. There should be some change in the pricing strategy. But when the new pricing strategy comes, I still feel a little bit frustrated.
A
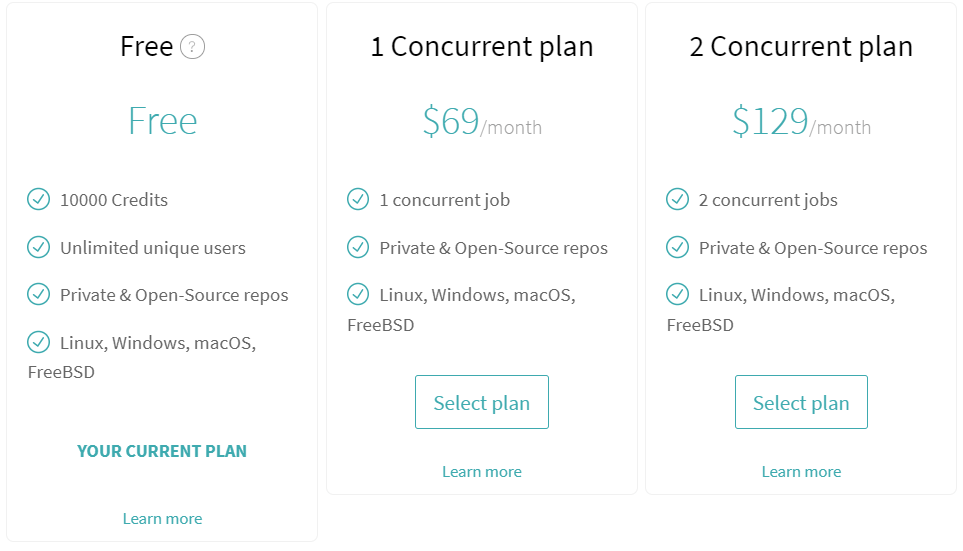
FreePlan, assigned automatically to every new sign up, is a Usage based plan with an unlimited amount of users which comes with a trial pool of credits to be used. Once these credits are used they are not replenished.
The new pricing plan offers 10000 credits for users to use freely and the credits will not be replenished once they are exhausted. At least 10 credits are paid for each build, which means the users only have a limited right of using the service now. I received the notice requesting payment because I have run out of my credits. I have to pay to continue using the service.
I checked the price of renewal, to be honest, it isn’t an attractive price. I think at least in China it isn’t.
To me, the reason for using Travis CI was because of the free model, and considering most of my projects on GitHub are non-commercial projects, I decided to abandon Travis CI and migrate my projects to another CI platform.
How about GitHub Actions?
GitHub published the CI system GitHub Actions in 2018, which can be thought of as a good substitute for Travis CI especially for the projects hosted on GitHub.

There are plenty of articles in the GitHub Docs to teach how to write your own GitHub Actions.
I have spent some hours reading through the below articles:
Travis CI and GitHub Actions are similar in terms of usage. They are all based on the YAML file format to write configuration files. The difference is GitHub Actions introduced the concept of the job in the workflows. Each job is separated into some steps, the step uses different actions to complete the function. So the users can set different actions according to different scenarios to reduce the complexity of development and speed up writing the configuration file.
This will provide great flexibility, I think that’s the most special thing about GitHub Actions.
Based on these features, many actions are developed by third-party developers for some common applications, such as grabbing code, running tests, logging on the remote server, publishing to third-party services, and so on. You can find them in the GitHub Marketplace.
If you want to start your CI, you don’t have to write complex actions by yourself. The quickest way is searching the GitHub Marketplace to find the actions that can fulfill the function you want and written by other contributors. You can construct the whole continuous integration process by combining actions.
Migrating to GitHub Actions
I decided to start the migration from my blog project. As I said above, both Travis CI and GitHub Actions use the YAML file format to write the configuration files, so the syntax is similar. What I do was rewriting the control flow with the GitHub Actions’ syntax and replaced the environment variables used in Travis CI.
The first thing was creating a .github/workflow folder in my blog’s repository then adding a YAML file.
It can be done by project repository's Action tab -> new workflow -> setup workflow with a template.
My blog’s CI process can be set for the below parts (see .travis.yml).
- Setup build environment in the virtual machine.
- Access permission authentication.
- Jekyll Build
- Deploy to GitHub Pages
- Clean up
I don’t want to re-write the above procedure in GitHub Actions, I searched the GitHub Marketplace and found some actions that can help me complete the above works.
Because I need to do some extra works before deploying the static website files to GitHub Pages after they are generated by Jekyll. Therefore, what I want is just a build action, instead of the build & deploy integrated action.
I finally picked this action build-jekyll-toolbox to help me build the website.
After the build, I ported some of the deploy codes written in Travis CI to GitHub Actions. Since both of them use Linux OS on the virtual machine, the shell commands are identical, I finished it quickly. The change was to replace the GH_TOKEN environment variable with the DEPLOY_TOKEN in GitHub Actions (They are the same token just with the different name).
Below is the last code in my ci.yml file:
name: CI

# Controls when the action will run.
on:
  # Triggers the workflow on push or pull request events but only for the master branch
  push:
    branches: [ dev ]
  pull_request:
    branches: [ dev ]

  # Allows you to run this workflow manually from the Actions tab
  workflow_dispatch:

# A workflow run is made up of one or more jobs that can run sequentially or in parallel
jobs:
  jekyll:
    name: Build and deploy Jekyll site
    runs-on: ubuntu-latest

    steps:
    - name: Checkout
      uses: actions/checkout@v2

    - name: Build
      uses: ealenn/jekyll-build-action@v1

    - name: Deploy
      run: |
        git config user.name "gangdong"
        git config user.email "dqdongg@hotmail.com"
        chmod 777 .
        cp -r ./_site  /tmp/
        cp ./_site/blog/index.html /tmp/_site/
        git checkout -b deploy
        sudo rm -rf *
        cp -r /tmp/_site/* ./
        ls -la
        git add -A
        git commit -m "github_ci update gh-pages dev -> 2f3f1699 add Github Actions for build and deploy"
        git push --force "https://${{ secrets.DEPLOY_TOKEN }}@github.com/gangdong/gangdong.github.io.git" deploy:gh-pages
My feeling
With the above works, GitHub Actions started to build and deploy my blog website for me. After the trial, my immediate reflection is that GitHub Actions is fast build and simple to use.
You can see from the above source code, I used 2 actions checkout@v2 and jekyll-build-action@v1 to fetch the code and build them on the virtual machine. It does simplify the writing of configuration file compare to writing them in Travis CI.
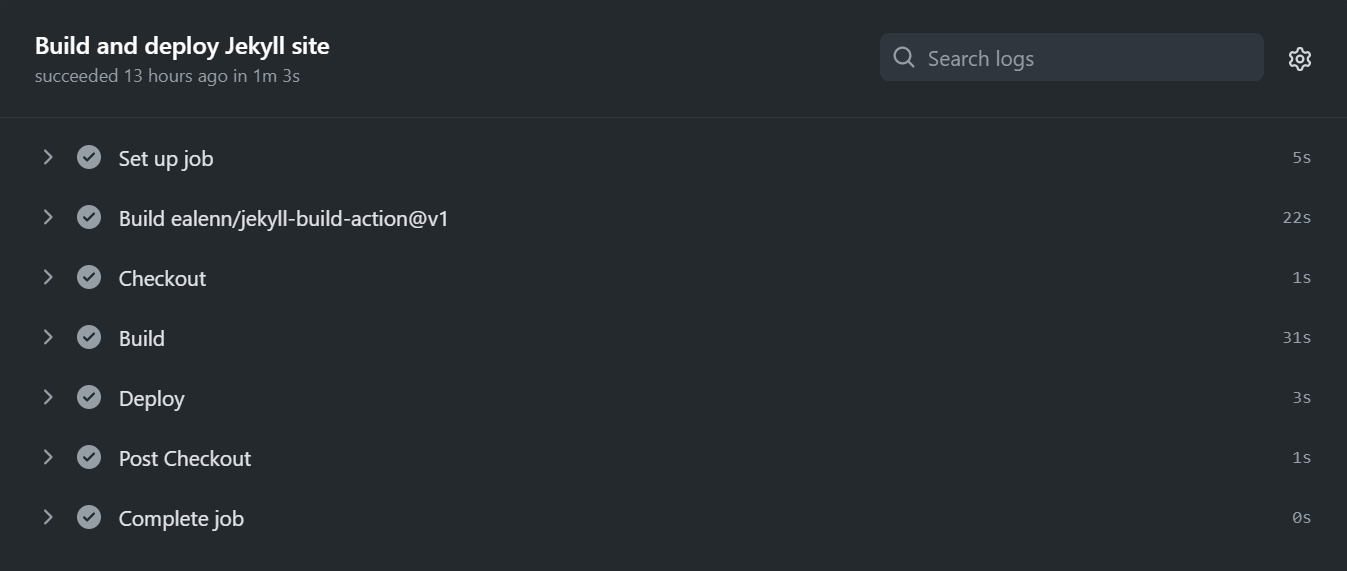
As the above screenshot showed, each step of the process is clear and the whole construction costs ~ 1 minute to complete. It is a great improvement than running in Travis CI, which took 3 ~ 4 minutes for the whole process. Although I haven’t know what caused the promotion internally yet, It did improve a lot.
Badges
Like Travis CI, GitHub Actions supports status badges, which let you indicate whether a build is passing or failing.
![]()
For more information, see
I think GitHub Actions is an alternative option if you are looking for another CI to replace Travis CI.
Hope my practice was useful for you.